Vacuum cups are inexpensive components, but a small leak, hardened lip or loose holder can stop a packaging cell, robot end effector or transfer station. A planned inspection routine is usually faster than diagnosing a dropped part during production. This guide gives a practical maintenance checklist for industrial vacuum cups, holders, fittings and tubing.
The intervals below are starting points. High cycle rates, abrasive workpieces, oil mist, heat, aggressive cleaning chemicals and porous materials can require more frequent inspection. Always follow the safety procedure for the machine, isolate motion and vacuum energy where required, and confirm the limits of the exact cup and holder model before returning equipment to service.
Start with a simple maintenance record
Record the cup model, material, installation date, machine position, workpiece, cycle count estimate and the reason for replacement. This turns maintenance from guesswork into a useful comparison between lines. If a cup on one station repeatedly fails earlier than identical cups elsewhere, inspect that station's approach height, side load, vacuum flow and workpiece condition before changing to a different material.
For each change, note whether the issue was a leak, loss of holding force, slow pickup, marking, deformation, swelling, cracking or a damaged connection. The inspection sequence in the vacuum cup troubleshooting guide is useful when the cause is not immediately visible.
Daily: inspect the sealing lip and pickup result
At the beginning of a shift, look at the working face of the cup under good light. Remove loose dust, paper fibers, film fragments or other contamination with a method compatible with the cup material. Do not use a sharp tool that can nick the sealing edge. A cup can look acceptable from the side while a small cut at the lip creates enough leakage to slow pickup or reduce the safety margin.
- Check that the lip is round, flexible and seated evenly on the workpiece.
- Look for cuts, flattened areas, tears, permanent set, swelling or surface glazing.
- Confirm that the selected model reaches the target workpiece without excessive compression or side drag.
- Watch several real picks: the cup should reach vacuum quickly, lift cleanly and release without sticking.
- Check that the workpiece surface has not changed because of dust, oil, moisture, protective film or a new material batch.
Clean cups without changing their material behavior
Cleaning should remove contamination without softening, swelling, cracking or leaving a slippery film on the cup. Use the approved cleaning method for the material and process. Silicone, nitrile rubber, polyurethane and other compounds do not have identical chemical resistance. If the cup changes color, becomes tacky, hardens or expands after cleaning, stop using that chemical until compatibility is confirmed.
A dry lint-free wipe or low-pressure clean air can be sufficient for dust and fibers. Avoid blasting debris deeper into a side port, filter or vacuum generator. When washing is required, dry the cup and connection before testing. Water or solvent left in the vacuum path can create an intermittent leak or carry contamination to other components. For a starting material comparison, see Silicone vs NBR Vacuum Suction Cups.
Weekly: check the holder, fitting, tubing and vacuum path
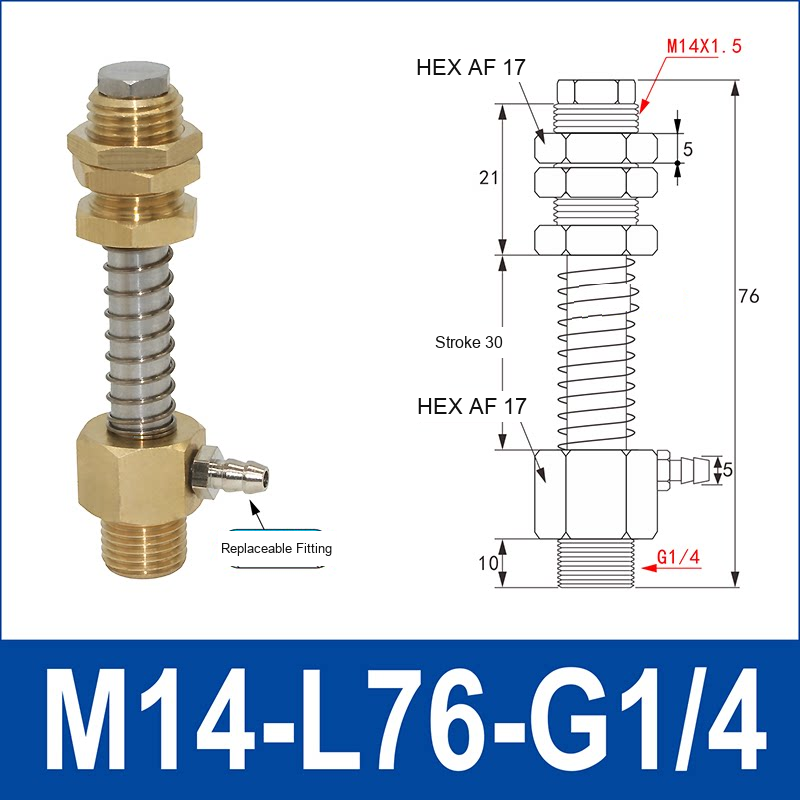
Many pickup problems originate above the cup. Inspect the holder thread, adapter, tube, hose clamp and side port. Look for a hose that has become brittle, crushed or pulled partly off a fitting. Check that the cup is not loose in its holder and that a spring-loaded mount moves freely through its intended stroke. A mount that sticks can apply side load to the cup or prevent it from following height variation.
- Verify cup thread and holder thread engagement; do not force mismatched metric or BSP connections.
- Check fittings for looseness, cracked sealants and damaged O-rings where applicable.
- Inspect filters and silencers for restriction, especially when handling paper, foam or dusty parts.
- Listen for audible leakage while the circuit is held under vacuum.
- Compare pickup time between identical stations if the machine has multiple heads.
Monthly: perform a repeatable pickup test
Choose a representative workpiece and use the same approach speed, vacuum level, dwell time and lift motion for every test. Record pickup time, whether the part moves under acceleration and the release result. A trend toward slower pickup is often more useful than a single pass/fail check. It can reveal a restricted filter, a growing leak or a material change before a production stop.
Do not treat calculated holding force as a certified machine rating. Cup diameter, actual contact area, leakage, acceleration, orientation, surface condition and safety factor all matter. Review the holding-force guide when a change in part weight or handling motion requires a new estimate.
Replace the cup when a defect is visible or performance trends down
Replace rather than reuse a cup with a torn lip, deep cut, permanent deformation, unexplained swelling, hardening, crack, leaking molded connection or repeated pickup failure after the vacuum path has been checked. Replacing a worn cup is usually lower risk than increasing vacuum level or dwell time to compensate for an unknown defect.
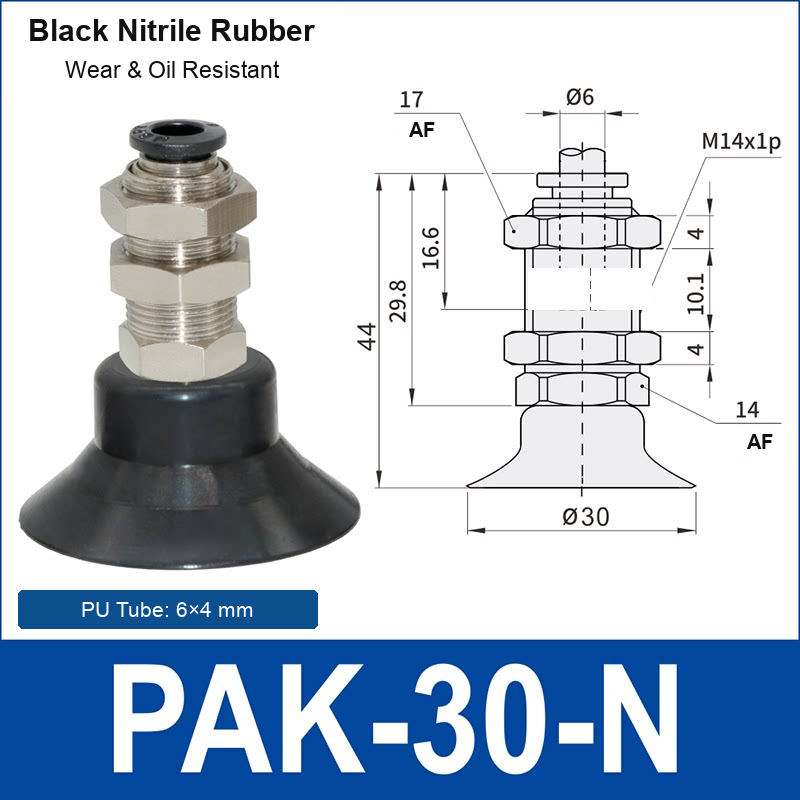
When a replacement is needed, confirm the original cup diameter, material, profile, mounting connection and any special requirement such as non-marking contact, temperature exposure or side-port routing. The holder and adapter range can help identify the matching connection, while the PAK side-port range provides a reference for compact side-port assemblies.
When to request application support
Request a review when cups repeatedly fail early, the part is porous or textured, the product must be handled at high speed, the application involves heat or chemicals, or the mounting thread and tube route are unclear. Include photos of the cup and workpiece, cup diameter, material, vacuum source, cycle time, lift direction, payload and the failure pattern. Request a Quote with those details to discuss a suitable cup, holder or custom configuration.
This checklist is general engineering guidance. It does not replace machine risk assessment, maintenance instructions or certified lifting-safety requirements.